|
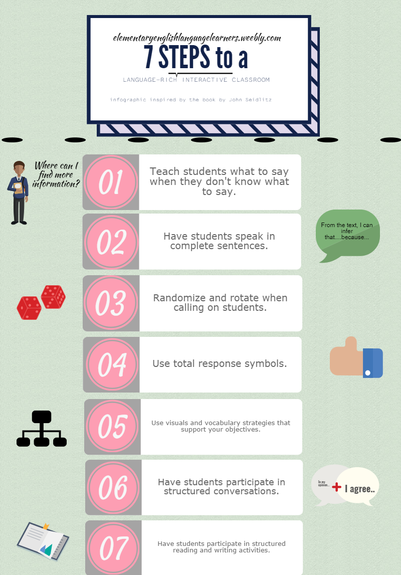
Click on the image above to download a PDF of the graphic. YEARS ago (and I mean YEARS), I was introduced to a book that was practical and served all students. This book was not meant solely for teachers of English Language Learners but for teachers of students-all students. At the same time, the techniques supported ELLs. The book is 7 Steps to a Language-Rich Interactive Classroom by John Seidlitz and Bill Perryman. Not only is the layout of this book super reader-friendly but it is also filled will practical, research-based instructional moves that are applicable to all content areas k-12. Some are obvious and when I read them I felt validated. Others were new for me and helped me to make my classroom room accessible to all students. Throughout my years in education, I've used this resource in many ways. I used it as a classroom teacher. In my own second, third, and fourth grade classrooms, I have been able to embed the 7 Steps into daily classroom instruction. I have also used this resource as an ESL Instructional Support Specialty Teacher serving and co-teaching in grades K-5. While co-teaching in classrooms, it's been a pleasure to insert the strategies into co-planning and instruction. And finally as a district PD Specialist, I have provided campuses with on-going, hybrid (both face-to-face and online) professional development aligned with the 7 Steps. Click here to learn more about creating systemic change with a campus wide book study. For campus or district leaders- Most recently, I created an activity to help teachers review and process the 7 Steps. It's a card sort used for campus training. I know that many of you also use the 7 Steps and might want to share with your campus. Whether you are an ESL teacher leader on your campus or a district ESL leader, you can use this at trainings to help learners process the steps to a language-rich interactive classroom. The idea of creating this came to after a co-worker made one for another PD-different topic-we were doing together. Teachers loved it, they were engaged, and we (as presenters) could quickly see what the participants knew or still had misconceptions about. I've included the cards here. Make as many copies as you need. Cut them out into small cards.
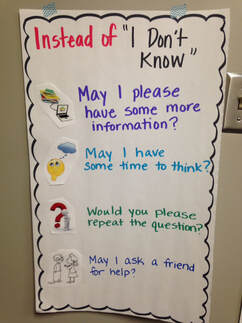
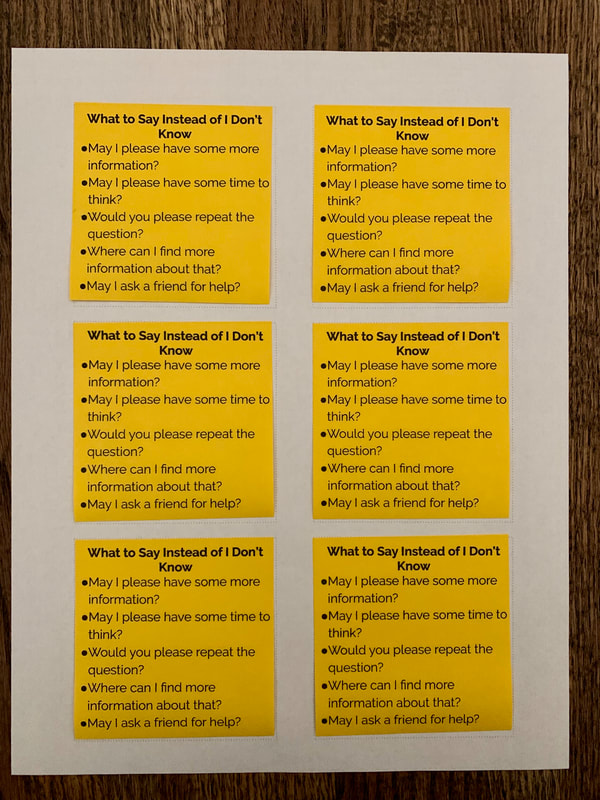
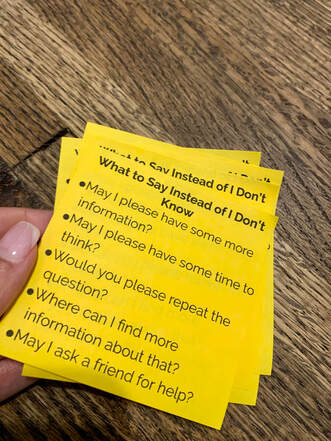
For Classroom Teachers- Updated 2019: Step One is Teaching Students What to Say Instead of I Don't Know. Many teachers effectively teach this step by explicit instruction and modeling. They pull students in close proximity and hold a class discussion or present a mini-lesson on the strategies while co-creating the chart. It's important that students know why to use the strategies, how to use them, and can find them easily as they learn to apply them. After teaching the strategies, students can also be given a bookmark with them or sticky note (see below). The nice thing about the bookmark or sticky note is that each student has access to the strategies no matter where they are or where they sit in the classroom. Instructions for printing the sticky notes are included here.
Rosemary
10/6/2019 06:15:11 pm
Hi Valentina! Would it be possible for you to add this visual to your infographics. I love using your visuals in my newsletter and would like a clearer image of this. Thank you for so many amazing posts!!
Valentina
10/7/2019 04:04:37 pm
Hi Rosemary, Comments are closed.
|
Categories
All
|
||||||||||||||||||
 RSS Feed
