|
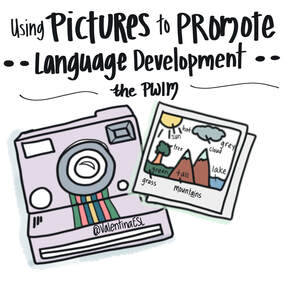
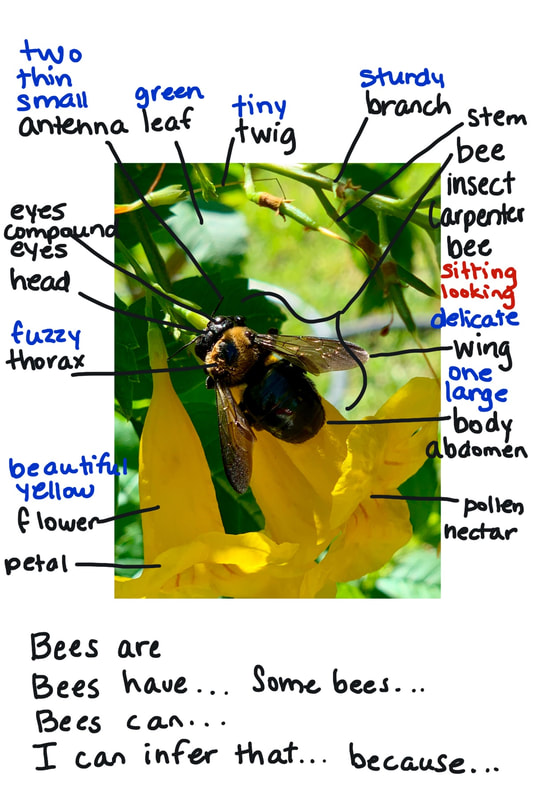
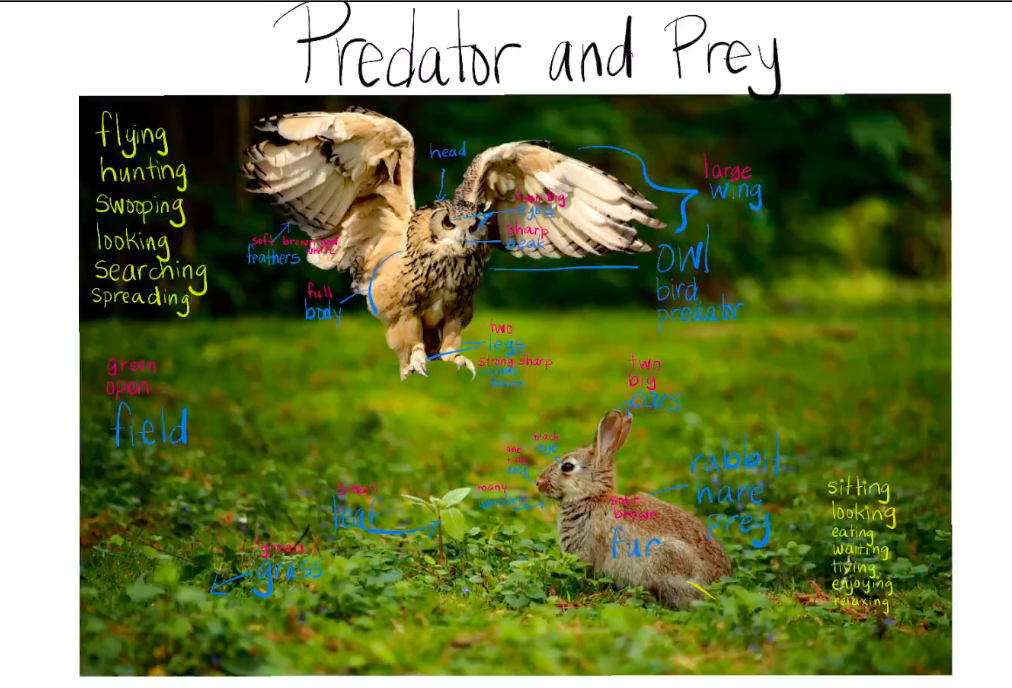
This article was originally posted on 2-25-2017 and has been updated on 9-17-2020 to include information relevant to distance learning. “A picture is worth a thousand words" or so we’ve heard. The question is, how do we encourage students to get those words out, especially if we are teaching and learning in remote or hybrid settings? Some of you may be familiar with the Picture Word Inductive Model (PWIM) which was first introduced by Emily Calhoun (1999). This instructional method has been successful in traditional classrooms for decades, but can we implement it in virtual settings too? Read on to find out what PWIM is and how you can implement it to develop language. What is PWIM and how do I use it to help my students with listening, speaking, reading, and writing? There is a misconception that pictures are only for primary students or for ELs at Beginner levels of English proficiency. But that's not the case. Though PWIM does benefit primary students and ELs at Beginner levels of English proficiency, even intermediate and Advanced ELs as well as Native English speakers gain valuable insights from this method across all content areas. Here's how I've used it in a modified version. Step 1: Select a picture relevant to the unit of current study and be mindful of the grade level objectives. If you teach science you might select a picture about the water cycle, life cycle of a butterfly, the Grand Canyon, etc depending on the grade level objective. A social studies teacher might choose a picture from history such as The Boston Tea Party, Amelia Earhart next to her plane, the Constitution, or a map, graph, chart or timeline, etc. A language arts teacher may present a picture that exemplifies character traits or feelings, a picture that relates to a theme that is being showcased, etc. Even math teachers can use PWIM by selecting pictures such as pictures with shapes, graphs, clocks, money, etc. Again, it’s important here to consider the grade level objective when selecting the image. Step 2: Share the image with students either in a whole group or in a small group setting. If you are teaching remotely, you can share the image on a shared google slide, a google doc, or another digital platform that your students are accustomed to using. (Day 1) Step 3: Label the picture together. Tell students that you will "shake out" all the words from this picture. Sometimes I let students brainstorm words on their own first and then share with a partner before we label the picture. During remote learning, you can put students in breakout rooms to brainstorm words. Then pull them back together to label as a class. As I label words, I spell them out or focus on phonics depending on the grade level and students' needs. We stop to read the words frequently, reading chorally or echo reading even in remote settings. (Day 1) Step 4: Put the words into categories. Ask students to categories the words either by spelling or by parts of speech. Once the class is finished labeling, students can work independently or in groups to categorize words. If your class is remote, you can duplicate the digital version of the picture you labeled and give each student or group a copy of it. They can work asynchronously to categorize the words using the digital copy. (Day 1 or 2 depending on time) Step 5: Ask students to brainstorm possible titles for the picture. Once many have been generated, discuss them. What makes a strong title? If needed, share examples from picture books or chapter books. Step 6: Give students time to discuss the picture in cooperative groups or breakout rooms and then verbally compose sentences. Provide students with sentence stems, starters or language frames to support complete sentences as needed even in virtual classroom environments. This step allows students to access their own background knowledge as well as tap into one another's knowledge. It builds on prior knowledge by supporting what they already know about a particular topic. For example, if you give students a picture of a colonial tent, and students share in their groups, some might say they see a house, while others would say it's a home or dwelling. (Day 2) Step 7: Next, record the sentences either on a chart, below the picture, or on a shared Google Document. Guide students in choral or echo reading the sentences after you write them even in remote learning. This reading practice supports language development and reading fluency. (Day 3) Step 8: Give students the opportunity to use the labels to write their own sentences about the image. The sentences created together as a class will serve as exemplars for their own writing. However not everyone will need the support of the example sentences. The students who can independently write their own sentences using the labels can work on their own while the teacher pulls a small group to model using the label to compose sentences. In virtual learning, the teacher can create a breakout room for students who need additional support. Consider asking the group the 5 Ws-Who, When, Where Why, What to help vary the sentences and create a strong understanding of the visual. (Day 3) There are many ways to vary PWIM to meet your own classroom and students' needs. There is no right or wrong way to do them as long as you are using pictures to develop language: thinking, listening, speaking, reading and writing. PWIM doesn't have to take long. They are not 45 minute lessons. And they are not solely for language arts classrooms. Pictures of historical events, cycles (water, life, etc.), geography, scientific experiments, math problems lend themselves beautifully to PWIM activities. Pictures are engaging, thought provoking, and help to make content comprehensible for students. The steps above are just suggestions. Make this model fit your students' specific needs. Try out a PWIM lesson and see where it takes you. This language rich learning strategy requires students to think, listen, speak, read and write in the content area of instruction. That's why I love it! Below are examples of PWIM as well as a video on how to implement PWIM in virtual classrooms. Resources Ferlazzo, L., & Sypnieski, K. H. (2012). The ESL/ELL teacher's survival guide. ready-to-use strategies, tools, and activities for teaching English language learners of all levels. San Francisco: Jossey-Bass. Calhoun, E. (1999). Teaching beginning reading and writing with the picture word inductive model. Alexandria: ASCD.
10 Comments
radunavent
9/18/2020 09:09:15 pm
I love this model and am looking forward to learning about more.
Reply
Anna Schnuck
9/19/2020 07:34:50 am
Hi, Valentina! I have been using this strategy in my classroom for 2 years now thanks to you and I love it! I have been trying to teach it virtually, but I am having trouble finding the best online platform to do this with. Our school’s suggested programs are canvas and Teams. I have been embedding google slides with pictures into canvas but have not found an easy way to write on a google slide.... thoughts? Thank you!
Reply
Mary Beth Gardner
11/4/2020 01:58:15 am
Hey Anna! One Google feature I love to use this model with is Jamboard. It is one of the Google apps you can find in the same waffle where you find Google slides. I love it because you can use it as your “virtual” board. It even lets you put up sticky notes. I hope this suggestion helps!
Reply
Anna Schnuck
12/3/2020 08:00:29 pm
Mary.... Thank you SO much for this comment! I started using Jamboard this month and LOVE IT! It makes using this strategy so easy for virtual learning! I started using Jamboard for my in-person classes as well and I just project it. Thank you again!
Elvin
9/21/2020 06:51:23 pm
s so cool
Reply
Melanie Schaffer
9/23/2020 09:52:07 pm
I Picture Word Inductive Model, or PWIM is central to my curriculum with my Inuit students. They often have no prior knowledge of the vocabulary which I teach. Most students would understand what a barn is; these students have never seen one and are unfamiliar with the animals that live in them. I provide much of the vocabulary, perhaps some brainstorming with them, but then expand upon all the words. I do a lot of acting out, and we do go off on tangents as they may ask, what do you do with all the cow poop? I draw many, many pictures for them, but they are good listeners and keen to learn about southern experiences. We reorganize vocabulary, identify spelling patterns, and discuss meaning. Using this model has helped immensely with their comprehension. The next step is getting my reluctant writers to write using the words provided. I do wish we had reliable internet above the Arctic Circle, but we do not. Your ideas are lovely, and I will follow them but using a printed picture.
Reply
Melanie Schaffer
9/25/2020 05:53:55 pm
The Picture Word Inductive Model, or PWIM is central to my curriculum with my Inuit students. They often have no prior knowledge of the vocabulary which I teach. Most students would understand what a barn is; these students have never seen one and are unfamiliar with the animals that live in them. I provide much of the vocabulary, perhaps some brainstorming with them, but then expand upon all the words. I do a lot of acting out, and we do go off on tangents as they may ask, what do you do with all the cow poop? I draw many, many pictures for them, but they are good listeners and keen to learn about southern experiences. We reorganize vocabulary, identify spelling patterns, and discuss meaning. Using this model has helped immensely with their comprehension. The next step is getting my reluctant writers to write using the words provided. I do wish we had reliable internet above the Arctic Circle, but we do not. Your ideas are lovely, and I will follow them but using a printed picture.
Reply
JoAnne CiliaDuncan
1/9/2021 09:51:18 am
Thank you for sharing this powerful strategy. I'm excited to share with my staff. We are focusing on Language Acquisition Strategies.
Reply
2/16/2021 12:37:59 pm
It is very impressive article to improve gross motor skills of kids. It is really useful for the kids who are facing disablities. Keep posting!
Reply
Lonni
8/5/2022 07:57:38 am
I love this model! I don’t have a picture, but I use this model in middle school English instruction with inferencing. I show a picture of a reaction from a person with a background (for example a child crying with an ice cream cone on the ground). and we note clues in the image to draw conclusions about the persons reaction. Then we write a paragraph about what happened in the photo using the notes to assist. I can also see using this with food chains and food webs in science. Also looking forward to possibly using this in math for adding, subtracting, multiplying, and dividing decimals. I can see so many ways to use this in my classroom!!
Reply
Your comment will be posted after it is approved.
Leave a Reply. |
Categories
All
|


 RSS Feed
